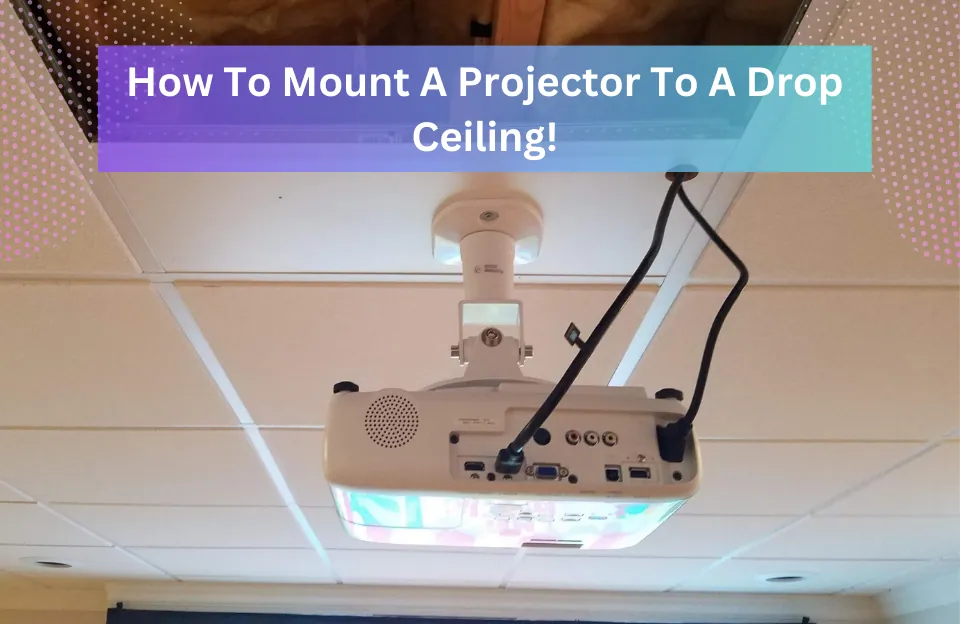
How To Mount a Projector to a Drop Ceiling: Projectors have become an irreplaceable tool, serving both as a source of entertainment and a means for professional presentations. And when it comes to creating a captivating visual experience, nothing beats the elegance of mounting a projector to a drop ceiling.
This ingenious setup not only liberates precious floor space but also effortlessly blends with the room’s aesthetics. Buckle up as we take you on a thrilling journey, unraveling the step-by-step guide to mastering the art of projector mounting (how to mount a projector to a drop ceiling).
Related: Short Throw Projector Ceiling Mount? (Guide & Steps)
What is a Drop Ceiling?
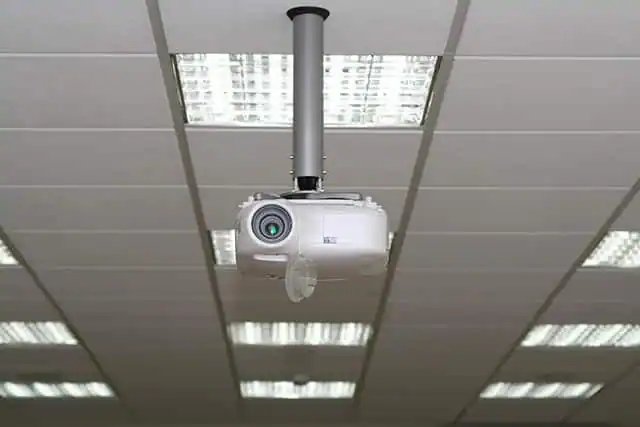
Imagine a ceiling within a ceiling – that’s precisely what a drop ceiling, commonly known as a suspended ceiling, entails. Crafted from a grid-like framework, these masterpieces reside beneath the primary structural ceiling.

Typically composed of metal bars and lightweight mineral fiber tiles, drop ceilings boast widespread popularity across commercial and residential spaces. Their easy installation and accessibility to concealed electrical and mechanical components make them a top choice.
Advantages of Ceiling-Mounted Projectors: Soar to New Heights
Venturing into the realm of ceiling-mounted projectors opens a world of possibilities, proving an unparalleled option for both home theaters and office presentations.
Space Efficiency:
Bid farewell to the need for separate projector stands or tables. Ceiling mounting takes center stage in space optimization, leaving ample room for other creative elements.
Clean Aesthetics:
Step into a realm of unblemished visuals, where cables discreetly weave their way above the ceiling tiles. The result? A professional setup free from clutter.
Optimal Projection:
Embark on a journey of unhindered projection paths and ideal viewing angles. Ceiling placement takes center stage, delivering an awe-inspiring visual experience.
Reduced Risk of Damage:
Protect your precious investment from harm’s reach. Ceiling mounting shields the projector from accidental bumps or falls, preserving its glory for years to come.
#1. Choosing the Right Projector: A Kaleidoscope of Possibilities

Consider Room Size and Dimensions
Unveiling the secrets of the perfect projector commences with the room’s dimensions in mind. Delve into the realm of projection distance and screen size, crucial elements that dictate your projector selection.
Short-Throw vs. Long-Throw
In the arena of smaller spaces, short-throw projectors take the crown. Magnificently projecting large images from limited distances, they redefine the boundaries of visual magic. On the other hand, standard or long-throw projectors seize the spotlight in more expansive arenas, conjuring the desired screen size.
Lumens and Throw Distance
Venturing into the realm of lumens, where brightness reigns supreme. Allow the room’s ambient light to guide you toward the perfect lumens match, unleashing crystal-clear and vibrant images. Embrace the harmony of natural light and lumens, illuminating your visual masterpiece.
Projector throw distance dances its way into the scene, entwining with your room’s dimensions. Find the perfect balance, allowing the projector’s throw distance to embrace the room’s entirety, enveloping viewers with a mesmerizing experience.
#2. Gathering the Necessary Tools and Equipment: The Arsenal of Perfection
Every journey demands the right tools, and your projector mounting odyssey is no exception.
The Power Drill: Embrace the power of precision with the ever-reliable power drill, drilling its way into your projector mounting dreams.
Screwdriver: The trusty companion in any DIY endeavor, tightening the bonds of your projector mount with unwavering strength.
Measuring Tape: Embrace the art of measurement, ensuring every step aligns with perfection.
Pencil: The humble pencil, an unsung hero guiding your marks with grace and precision.
Stud Finder: The all-knowing guide, unraveling the secrets of sturdy support beams and joists, ensuring your projector takes its rightful place.
Ladder or Step Stool: Ascend to greater heights with confidence and safety, embracing the ladder or step stool as your loyal ally.
Cable Ties or Clips: Tame the unruly cables with finesse and order, creating a harmonious setup.
Level: Embark on a quest for balance and perfection, wielding the level as your trusted compass.
And with your arsenal complete, prepare the drop ceiling for the grand installation.
#3. Preparing the Drop Ceiling: Building the Foundation
Checking Ceiling Stability
Begin your journey with a quest for stability. Assess the drop ceiling’s structural strength, ensuring it can bear the projector’s weight and the mounting bracket. Should doubts linger, trust a professional to unveil the ceiling’s true potential.
Identifying the Ideal Location
Ponder the art of perfect projection, as you embark on a quest to find the ideal projector location. Strategize and visualize the optimal distance from the screen, screen size, and potential obstructions. Allow the measuring tape and pencil to unveil the projector’s future home.
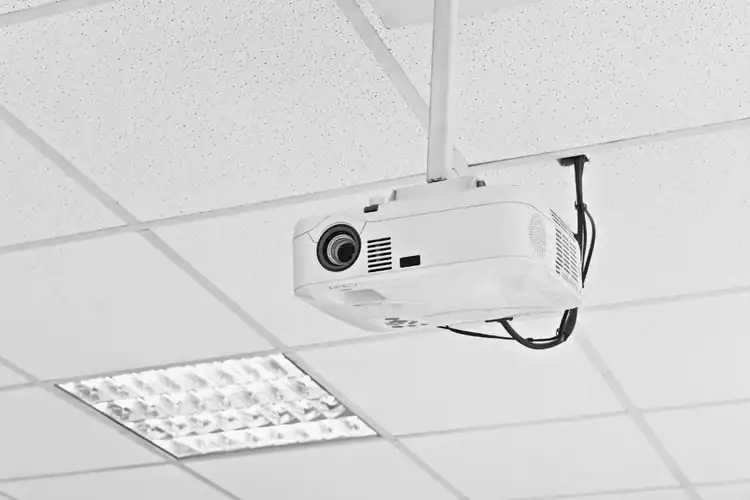
#4. Installing the Mounting Bracket: Laying the Path to Greatness
Assembling the Mounting Bracket
Embrace the manufacturer’s guidelines, assembling the mounting bracket with grace and precision. Each step breathes life into the setup, unveiling your mounting masterpiece.
Securing it to the Ceiling Grid
The time has come to tether the projector’s dreams to reality. Seek the support of a sturdy beam or joist through the stud finder’s all-knowing gaze. With power drills and screws as your allies, forge a bond with the ceiling grid, securing the mounting bracket for eternity.
#5. Connecting the Projector: Weaving the Web of Wonders
Placing the Projector on the Bracket
The time has come to crown your ceiling-mounted monarch. Carefully place the projector on its throne – the mounting bracket. Align its vision with the screen, and bask in the glory of a perfect match. Tighten the adjustable screws with unwavering determination, ensuring the projector’s eternal place.
Cable Management
The quest for visual harmony begins as you tame the mighty cables. Command them into orderly submission, securing their path along the ceiling grid or extension poles. Witness as chaos transforms into elegance, allowing the visuals to reign supreme.
#6. Adjusting the Projector: A Dance of Perfection
Aligning with the Projection Screen
Embrace the role of the projector’s maestro, conducting a symphony of perfection. With the level as your baton, finesse the projector’s angle to reveal an image in perfect harmony with the screen. Should distortion dare to taint the spectacle, keystone correction awaits to save the day.
#7. Testing and Fine-tuning: Ascend to Visual Brilliance
Powering On the Projector
The moment of truth arrives as you breathe life into your projector. Connect it to a power source and witness its brilliance illuminating the room. Adjust the focus and zoom settings, allowing the image to sharpen into a crystal-clear masterpiece.
Image Calibration
Now, the projector’s menu settings come into play, unveiling a world of image refinement. Dance through brightness, contrast, and color balance, tweaking each element until perfection graces the screen.
You May Also Like:
- How To Clean A Projector Screen (Top Secrets Revealed!)
- Learn How To Hang A Projector Screen Like A Pro!
- Projector Screen vs. Wall – Which One Delivers the Perfect Viewing Experience?
- Projector In Basement: Turn Your Basement into a Home Theater Haven
- Best Cheap Projector Under 50$ [Top 11 Picks]
Securing Wires and Safety Measures: Enchantment and Safety Combined
Cable Management Tips
Unleash the magic of cable management, ensuring every wire finds its rightful place. Bid farewell to tangling and chaos, welcoming visual order and viewer safety.
Ensuring a Safe Setup
Embrace the role of vigilant protector, double-checking each connection and mounting point. The projector’s safety lies in your hands. Regularly inspect the setup, guarding against wear or damage, ensuring the projector’s glory endures.
Troubleshooting Common Issues
Dealing with Image Distortion
Should the specter of distortion appear, fear not, for you wield the power of keystone correction and projector angle adjustment. Meticulously fine-tune the elements, banishing distortion to the realm of forgotten nightmares.
Addressing Connectivity Problems
Should connectivity woes darken the stage, wield the power of reconnection and cable inspection. Ensure all connections stand firm, building an unbreakable bridge between projector and source device. On extension poles, seek the root of the issue, untangling any entwined threads.
Maintaining Your Ceiling-Mounted Projector: A Symphony of Longevity
Regular Cleaning
Dust and debris form an unholy alliance, threatening your projector’s brilliance. Yet fear not, for the humble cloth stands ready to cleanse the lens and vents, preserving the image’s glory.
Maintenance Tips
The dance of maintenance commences with periodic inspections and tightening of screws and connections. A vigilant eye on the projector’s lamp life ensures the brightness endures, safeguarding its impact.
Alternative Mounting Options: The Symphony of Choice
Wall Mounting
A tapestry of alternatives unfolds, embracing wall mounting as a worthy counterpart to ceiling mounting. In the realm of higher ceilings or specific projection angles, wall mounting takes its rightful place.
Portable Ceiling Mounts
Venture into the realm of portability, embracing the allure of temporary setups and easily removable mounts. Portable ceiling mounts offer flexibility in projector placement, catering to locations where permanence is not feasible.
Enhancing Your Viewing Experience: Elevating the Visual Symphony

Choosing the Right Screen
A canvas of possibilities presents itself, as you select the perfect projection screen. Consider screen size, material, and aspect ratio as your tools of optimization, forging an unforgettable viewing experience.
Related: Best ALR Projector Screen: What You Need to Know
Surround Sound Setup
The magic of surround sound beckons, elevating the audio symphony to new heights. Immerse yourself in a world where sound and visuals intertwine, breathing life into your content.
Using Projector Mount Accessories
Security Locks
Fortify your projector’s fortress, embracing security locks as your shield against theft or unauthorized access. Unleash the peace of mind, knowing your projector remains protected.
Extension Poles
Reach for the stars as you wield the power of extension poles. In rooms with soaring ceilings, extend your projector’s reach, ensuring its vision captures the perfect center.
How To Mount A Projector To A Drop Ceiling: FAQs

Can I mount any projector to a drop ceiling?
While most projectors are compatible with ceiling mounts, it’s essential to check the projector’s specifications and mounting requirements before making a purchase.
Do I need professional help for ceiling mounting?
If you have some experience with DIY projects and follow this guide carefully, you can perform the installation yourself. However, if you’re unsure about your abilities or the ceiling’s stability, it’s best to consult a professional.
How far should the projector be from the screen?
The ideal projection distance depends on the projector’s throw ratio and the desired screen size. Refer to the projector’s manual or use an online calculator to determine the optimal distance.
Can I adjust the projector’s angle after mounting?
Yes, most ceiling mounts allow adjustments to the projector’s angle. Utilize the keystone correction feature and any adjustable screws on the mounting bracket to align the projected image correctly.
What maintenance does a ceiling-mounted projector require?
Regularly clean the projector’s lens and vents, inspect and tighten connections, and replace the projector’s lamp when needed. Following these maintenance steps ensures optimal performance and longevity.
Recommended:
- Projector Screen vs. Wall
- PG 13 vs TV 14: What You Need to Know!
- Best Cheap Projector For PowerPoint Presentations
- Best 4K Projector for Gaming [Top 7 Picks]
Conclusion
Ceiling mounting a projector offers a plethora of benefits, transforming your home theater or presentation space into a professional and visually stunning environment. By following this step-by-step guide, you can confidently mount your projector to a drop ceiling, ensuring a secure and functional setup. Thanks For Reading!
As an experienced Software Engineer in a Projection-Based Technology Company, I love sharing my Knowledge to utilize and help others to learn more about Projectors. Thus one can get the right Projector for their needs.