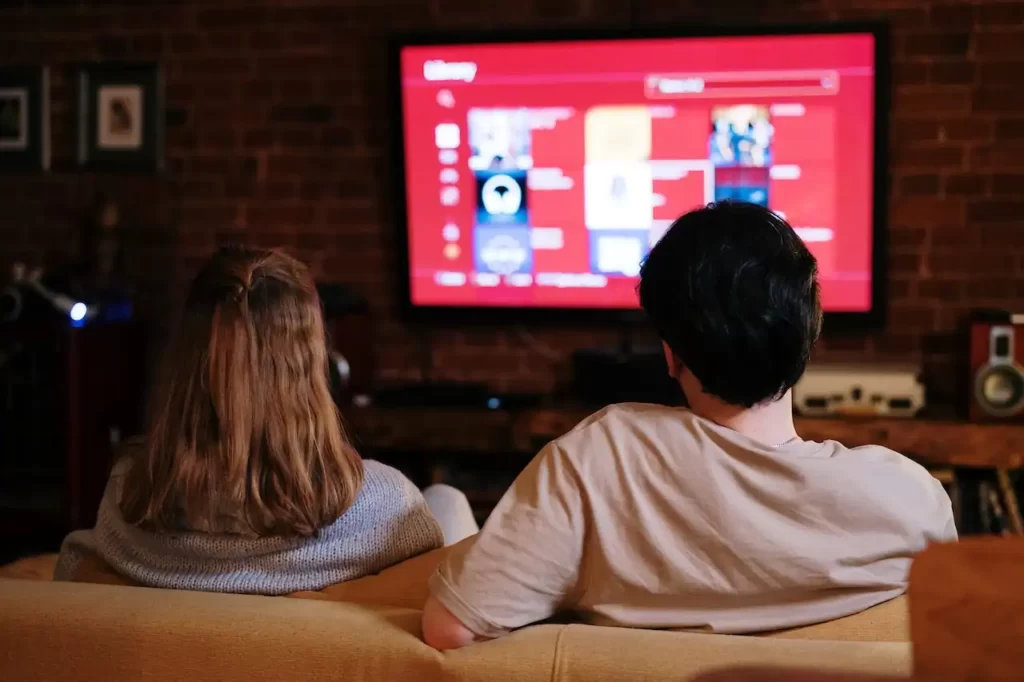
Using a projector outside during the day can be an exciting and immersive experience, when you’re hosting a backyard movie night, organizing a corporate event, or simply enjoying some quality time with friends and family. But the bright sunlight can pose challenges when it comes to achieving optimal image quality and visibility.
That’s why we are here to tackle this challenge by providing you with effective techniques and tips.
With the right equipment and proper techniques explained in this article, you can achieve excellent results and create an impressive outdoor projection experience.
This will help you make the most of your outdoor projector setup during daylight hours.
So, gather your loved ones, select a great movie, and enjoy the wonders of outdoor projection, even under the sun!
Understanding Problems and Challenges
Using a projector outside during the day requires careful planning and consideration of various factors. While projectors are typically designed for indoor use, advancements in technology have made outdoor projection a feasible option.
By understanding the limitations of projectors and implementing certain adjustments, you can create a memorable outdoor viewing experience. Below are some challenges given to tackle:
Sunlight and Brightness
The primary challenge of outdoor daytime projection is combating the brightness of the sun. Sunlight can wash out projected images, making them appear dull and difficult to see. Therefore, it’s crucial to choose a projector that offers high brightness levels.
Ambient Light and Contrast

Apart from sunlight, ambient light from the surrounding environment can also affect the clarity and contrast of projected images. Excessive ambient light can reduce the visibility of dark scenes and diminish the overall image quality. To overcome this challenge, proper consideration should be given to the projector’s contrast ratio.
Screen or Surface Selection
Choosing the right projection surface is essential for achieving vibrant and clear visuals outdoors. Traditional white projector screens may not be suitable in bright environments, as they may reflect too much light and result in washed-out images.
Alternatively, specialized screens designed for outdoor use, such as ambient light rejecting (ALR) screens, can improve image quality by reducing the impact of ambient light.
Understanding Projectors and Their Limitations
Before delving into the details of outdoor projection, it’s important to have a basic understanding of projectors and their limitations. Projectors work by projecting an image onto a surface using light and lenses.
However, the brightness and visibility of the projected image can be affected by ambient light conditions.
Projectors typically struggle to compete with the bright sunlight, resulting in washed-out or dim images. Overcoming this challenge requires careful consideration of several factors.
What is a Projector?
A projector is a device that projects images or videos onto a surface, typically a screen. It’s a fantastic tool for large displays, making it perfect for outdoor gatherings or presentations.
Types of Projectors
LCD Projectors
These projectors use liquid crystal displays to produce images.
They are known for their sharp and vibrant colors, making them suitable for outdoor use where ambient light might wash out duller images.
DLP Projectors
Digital Light Processing projectors offer high contrast and fast response times. They are generally more compact and have fewer moving parts, which means less maintenance.
LED Projectors
LED projectors use light-emitting diodes as their light source. They are energy-efficient and have a longer lifespan, but might not be as bright as their LCD or DLP counterparts, which is crucial for daytime use.
Related: Best Projector For Daylight Viewing
Selecting the Right Projector
To ensure a successful outdoor projection during the day, selecting the right projector is crucial. Consider the following factors when choosing a projector:
Brightness and Lumens

Look for a projector with high brightness levels, typically measured in lumens. The brighter the projector, the better it can compete with ambient light and sunlight. For daytime outdoor projections, a projector with at least 3,000 lumens or more is recommended.
Related: What is a Good Amount of Lumens for a Projector?
Contrast Ratio
The contrast ratio determines the difference between the darkest and brightest areas of an image. A higher contrast ratio will ensure better image clarity, especially when dealing with ambient light. Look for projectors with a high contrast ratio or dynamic contrast features.
Related: All About The Common Projector Contrast Ratio
Outdoor Compatibility
Opt for projectors explicitly designed for outdoor use or those labeled as “outdoor compatible.” These projectors are built to withstand environmental factors such as dust, humidity, and temperature fluctuations, ensuring durability and long-lasting performance.
Related: What Are Camping Projectors? How to Use Them Perfectly!
Choosing the Perfect Outdoor Location
Selecting the right outdoor location for your projector setup is crucial for optimal image quality. Consider the following factors:
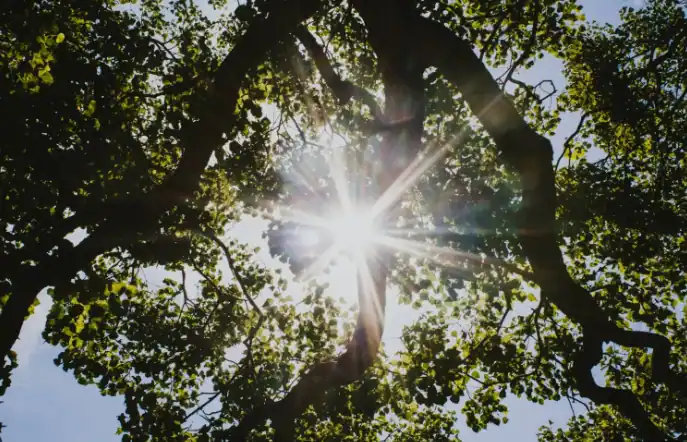
Shade and Sun Positioning
Look for areas with natural shade, such as under trees or canopies, to minimize the impact of direct sunlight on the projected image.
Additionally, consider the position of the sun during your intended projection time and plan accordingly to avoid direct sunlight falling on the screen.
Avoiding Direct Sunlight
Direct sunlight can significantly diminish the visibility of your projected image. Position the screen in such a way that it is not directly facing the sun. This will help prevent excessive glare and ensure better image clarity.
Creating a Darker Environment
If shading alone is not sufficient, you can create a darker environment around the projection area. Use blackout curtains, portable partitions, or any other suitable materials to block out ambient light sources and create a more controlled viewing space.
Optimizing the Image Quality
To achieve the best image quality during daytime outdoor projections, consider the following tips:
Adjusting Brightness and Contrast Settings
Most projectors offer adjustable brightness and contrast settings. Experiment with these settings to find the optimal balance for outdoor use.
Increase the brightness to counteract the impact of sunlight, while adjusting the contrast to enhance image details and improve visibility.
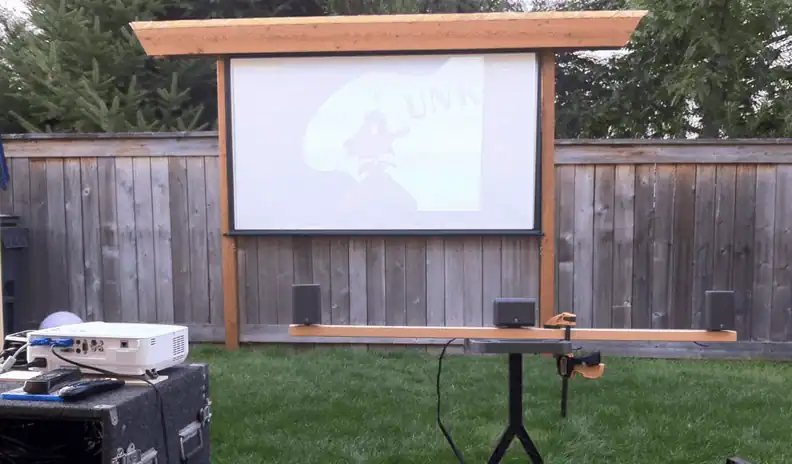
Using a High-Quality Projection Screen
Investing in a high-quality projection screen specifically designed for outdoor use can greatly enhance image quality. ALR screens are designed to reject ambient light and preserve the contrast and clarity of the projected image.
These screens often have specialized coatings or materials that help reduce the impact of ambient light sources.
Enhancing Color and Sharpness
Calibrate your projector to ensure accurate color reproduction and sharpness. Adjust the color settings to match the ambient lighting conditions, and make sure the image is in focus and properly aligned with the screen.
Audio Considerations
In addition to visual quality, audio plays a vital role in outdoor projections. Consider the following factors when setting up audio for your outdoor projector:
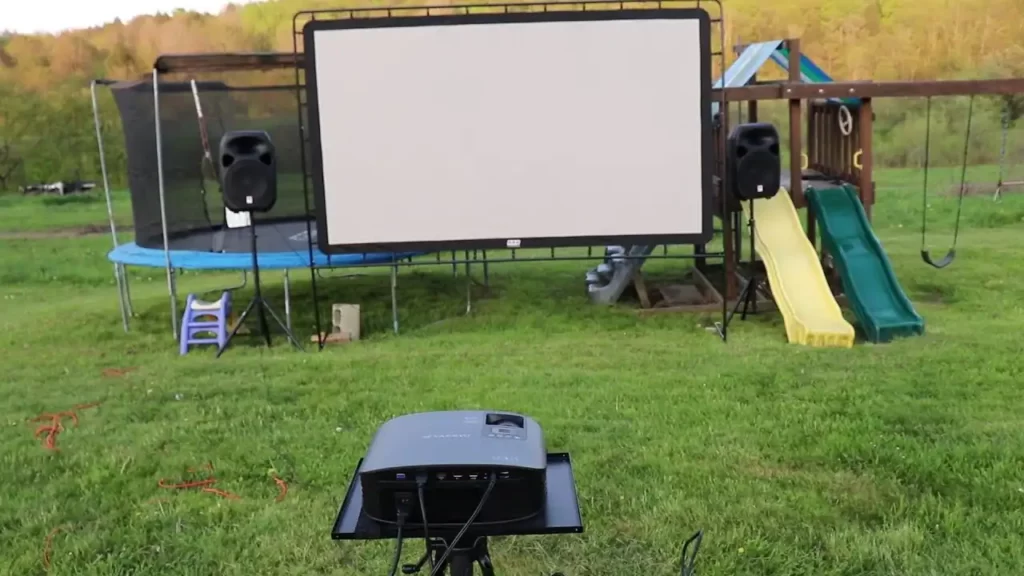
External Speakers
Most projectors come with built-in speakers, but their sound output may not be sufficient for outdoor use. Invest in external speakers or a portable sound system to ensure clear and audible audio during your outdoor projections.
Background Noise
Outdoor environments often have background noise from various sources, such as traffic, wind, or nearby activities. Choose speakers with good sound projection and clarity to overcome these external noise factors and ensure a pleasant audio experience.
Acoustic Environment
Outdoor spaces may have different acoustic properties than indoor environments. Take into account the open nature of the space and consider any potential sound reflections or echoes. Test the audio setup in advance and make adjustments as necessary to achieve optimal sound quality.
Power Source and Connectivity
For seamless outdoor projection, pay attention to power sources and connectivity options:

Portable Power Options
Ensure that you have a reliable power source for your projector. Consider portable power options, such as battery packs or generators, if a power outlet is not readily available near your outdoor setup.
Calculate the required power consumption of your projector and any additional devices to determine the appropriate portable power solution.
Extension Cords and Power Banks
If a power outlet is available but not conveniently located near your projection area, use extension cords to extend the reach. Alternatively, consider using power banks or portable battery packs to power your projector for shorter durations.
HDMI and VGA Connections
Ensure your projector has the necessary ports to connect your devices. HDMI is the most common for high-definition content.
Wireless Connectivity Solutions
To avoid long cable runs, consider using wireless connectivity options for transmitting the video signal to the projector.
Wireless HDMI kits or screen mirroring devices can provide convenient and reliable connectivity, allowing you more flexibility in projector placement.
Setting Up and Positioning the Projector
To ensure optimal image projection and stability, follow these setup and positioning guidelines:
Stable Surface or Mounting Equipment
Place the projector on a stable surface or use mounting equipment specifically designed for outdoor use. Stability is essential to prevent any vibrations or movement that may affect the image quality or cause the projector to shift out of alignment.
Optimal Throw Distance
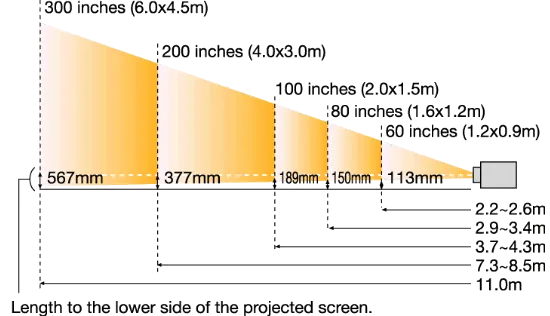
Consult the projector’s user manual to determine the optimal throw distance for your desired screen size. Maintaining the recommended distance will ensure the sharpest image quality and prevent distortion.
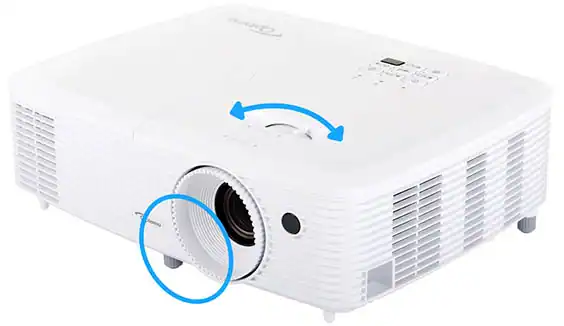
Keystone Correction and Image Alignment
Most projectors offer keystone correction features to adjust the projected image and correct distortion caused by the projector’s angle relative to the screen. Make use of these features to align the image properly and ensure a rectangular projection.
See More:
- How to Connect Android Phone to Projector via HDMI Cable?
- How To Fix Sound Delay On Projector? (Causes & Solutions)
- How to Watch TV on Projector without a Cable Box
- Best Projector For Bright Rooms
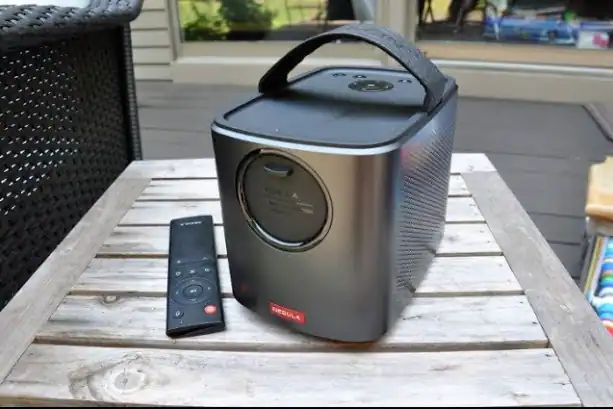
Daytime Projector Accessories
Consider using the following accessories to further optimize your outdoor projection setup:
Sunshades and Canopies
Attach sunshades or canopies to your projector or projection screen to block direct sunlight and reduce glare. These accessories can significantly enhance image visibility and ensure a more enjoyable viewing experience.
Ambient Light Rejecting (ALR) Screens

Invest in ALR screens specifically designed for outdoor use. These screens are designed to reject ambient light, resulting in better contrast and image clarity even in bright outdoor environments.
ALR screens often have specialized coatings or materials that minimize the impact of ambient light sources.
Tripods and Mounts
Sturdy tripods and mounts help position the projector correctly and keep it stable during use.
Portable Projector Enclosures
If your projector doesn’t have built-in weatherproofing features, consider using portable projector enclosures to protect the device from dust, humidity, and other environmental elements.
These enclosures provide an added layer of protection and ensure the longevity of your projector.
External Speakers
Projectors often have built-in speakers, but they might not be powerful enough for outdoor use. Invest in external speakers for better sound quality.
Outdoor Projection: Tips & Tricks
To make the most of your outdoor projection setup, keep the following best practices in mind:
Timing and Time of Day
Choose the optimal time of day for your outdoor projections. Evening or late afternoon hours, when the sunlight is less intense, generally offer better visibility.
Consider scheduling your events accordingly to maximize image quality.
Testing and Adjusting
Perform thorough testing and adjustments before the actual event. Set up your projector, screen, and audio equipment in advance to allow for any necessary fine-tuning.
Test the image quality, audio levels, and overall setup to ensure everything is working as intended.
Outdoor Projection Safety
Ensure the safety of your outdoor projection setup by adhering to electrical safety guidelines, using proper mounting equipment, and securing all cables and cords to prevent trip hazards.
Follow manufacturer instructions and recommendations for outdoor projector use to minimize any potential risks.
You May Check All Specs Here: Learn All About Projector Specs: An Beginner Projector’s Guide!
How To Use a Projector Outside During The Day: FAQs

Can I use any projector for outdoor daytime projections?
While any projector can be used outdoors, it’s essential to choose one with high brightness levels and outdoor compatibility for optimal performance in bright environments.
How can I improve the audio experience during outdoor projections?
Invest in external speakers or a portable sound system to ensure clear and audible audio. Consider the acoustic environment and potential background noise when selecting your audio setup.
Do I need a specialized screen for outdoor projections?
Traditional white screens may not perform well in bright outdoor environments. Consider using ambient light rejecting (ALR) screens designed for outdoor use, as they can improve image quality by reducing the impact of ambient light.
Can I use a projector outside during cloudy or overcast days?
Yes, projectors can still be used outdoors on cloudy or overcast days. While the brightness of the image may not be affected by direct sunlight, consider ambient light conditions and adjust your setup accordingly.
Can I project onto any surface for outdoor projections?
While you can project onto various surfaces, using a dedicated projection screen or an ALR screen designed for outdoor use will offer better image quality and visibility compared to projecting onto a random surface.
Final Thoughts
The brightness and visibility of the projected image can be affected by ambient light conditions. Therefore projectors typically struggle to compete with the bright sunlight which is resulting in washed-out or dim images.
So overcoming this challenge requires careful consideration of several factors and we hope you can get rid of these challenges by reading the factors given in this guide.
Remember to follow best practices, test your setup in advance, and prioritize safety for successful outdoor daytime projections.
With the right techniques, equipment, and considerations, it can be a unique and enjoyable viewing experience. Thank You For Reading!
As an experienced Software Engineer in a Projection-Based Technology Company, I love sharing my Knowledge to utilize and help others to learn more about Projectors. Thus one can get the right Projector for their needs.