Projectors are a popular choice for presentations, movie nights, and other multimedia purposes. However, like any other electronic device, projectors require regular maintenance to ensure optimal performance and longevity.
Regular maintenance is essential to ensure optimal projection. As we know Projector filters play a crucial role in maintaining the quality of the projected image, cleaning the projector filter is one of the essential aspects of projector maintenance.
A clean Projector Filter allows for better airflow, preventing overheating and ensuring a clear and vibrant image projection. Therefore, here, we will guide you on how to properly remove and clean a projector filter, ensuring your projector continues to deliver crisp and clear visuals.
Understanding Projector Filters
Before delving into the process of removing and cleaning a projector filter, let’s first understand what a projector filter is. A projector filter is a small, yet vital component that prevents dust, dirt, and debris from entering the projector’s internal parts.
It acts as a barrier, safeguarding the delicate optical elements from potential damage. Different projectors use various types of filters, such as foam, mesh, or hybrid filters, each with specific filtering capabilities.
Why is Cleaning the Projector Filter Important?
As discussed above the projector filter acts as a barrier, preventing dust particles and other contaminants from entering the projector’s internal components, when the filter becomes clogged, the airflow is restricted, and the projector’s cooling system may struggle to dissipate heat effectively.
This can result in decreased brightness, poor image quality, and even damage to the projector’s internal parts. Regularly cleaning the projector filter helps to maintain proper airflow, prolonging the lifespan of your device.
Read More: How To Use a Projector Outside During The Day?
Signs of a Dirty Projector Filter

When the projector filter becomes clogged with dust and dirt, it can lead to several performance issues. One of the most common signs is a significant reduction in image brightness. If you notice the projected images appearing dimmer than usual, the filter might be due for cleaning.
Additionally, overheating is another symptom of a dirty filter, as it obstructs proper airflow and ventilation. An overheated projector may shut down unexpectedly, potentially causing inconvenience during a presentation. Furthermore, a dirty filter can affect the colors and image quality, leading to distorted visuals.
Preparing for Maintenance: What You’ll Need

To avoid any mishaps during the cleaning process, it is crucial to prepare your workspace adequately. Before you begin, collect the below-listed tools or materials:
- Soft brush or compressed air canister
- Microfiber cloth
- Mild detergent or projector filter cleaning solution
- Water
- Container or sink for cleaning
Step-by-Step Guide to Removing the Projector Filter
Below are the steps to safely remove the projector filter:
Turn Off and Unplug the Projector
Before handling any internal components, ensure that the projector is powered off and unplugged. This step minimizes the risk of electric shock and protects both you and the device.
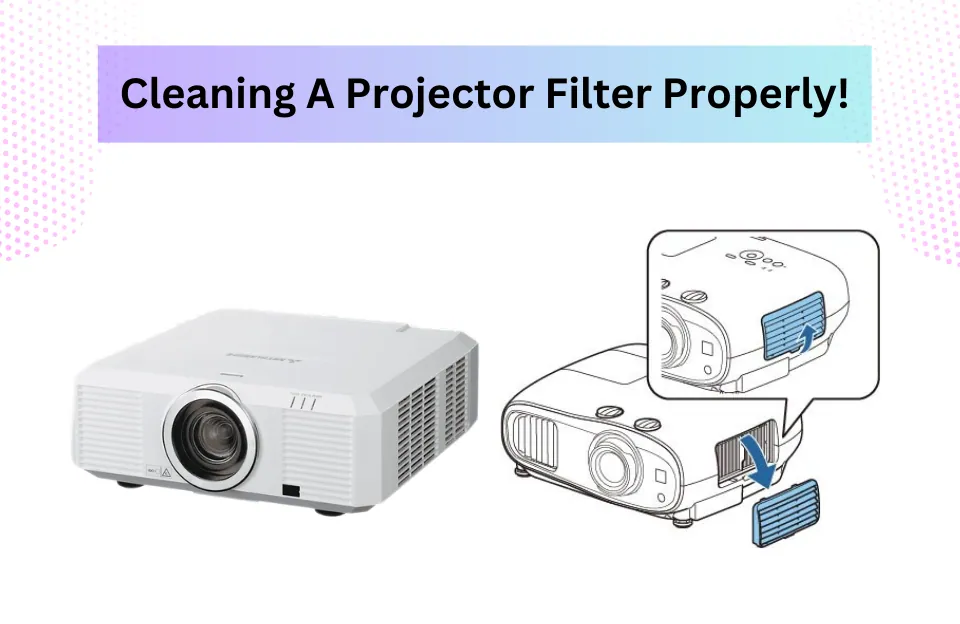
Locate the Filter Compartment
The projector filter is typically located on the side or bottom of the projector. Refer to the user manual or manufacturer’s instructions to identify the exact location of the filter in your specific projector model. Once located, prepare yourself for the removal process.
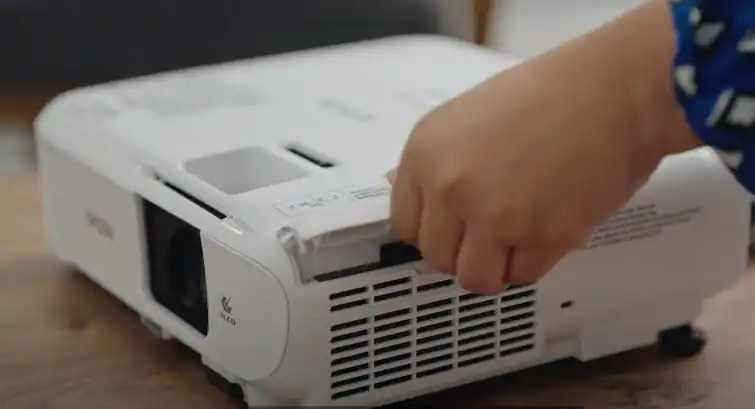
Remove the Filter
Carefully remove the projector filter from its housing. Take note of the filter’s orientation and how it is installed, as this will be important when reinstalling it later. Some projector filters may have a latch or release mechanism, while others can be gently pulled out.
Be cautious and avoid using excessive force to prevent any damage to the filter or the projector.
How To Clean A Projector Filter: Different Methods

Cleaning the projector filter helps remove accumulated dust and debris, allowing proper airflow and preventing performance issues. There are two common methods for cleaning the filter:
Method 1. Using Compressed Air
If the filter has light dust and debris, use a can of compressed air to blow away the particles. Hold the compressed air canister upright and at a safe distance from the filter while cleaning.
Method 2. Cleaning with a Soft Brush
For slightly more stubborn dirt, use a soft brush to gently remove the debris from the filter. Ensure that the brush has soft bristles to avoid damaging the delicate filter material.
Method 3. Washing the Filter
If the projector filter is heavily soiled, washing it with water is a more thorough cleaning option. Gently rinse the filter under running water, using mild soap if necessary. Be careful not to scrub the filter aggressively, as it can cause damage. After rinsing, pat the filter dry with a soft cloth or allow it to air dry completely before reinstalling.
Reinstalling the Projector Filter
Once the filter is dry, carefully reinstall it in its original position. Ensure a secure fit to prevent any gaps that may allow dust to enter. If the filter requires screws, tighten them gently but not excessively.
Testing the Projector
Now that the filter is back in place, it’s time to test your projector. So to do so you need to just Plug it back and turn it on. Check if the airflow is smooth and if the image projection appears clear and vibrant. If everything looks good, congratulations! You have successfully cleaned your projector filter.
Replacing the Projector Filter
If your projector’s filter is non-reusable or damaged beyond cleaning, you will need to replace it. So you can follow below steps:
Step 1: Find the Right Replacement Filter
Consult your projector’s manual or contact the manufacturer to identify the correct replacement filter for your specific projector model. Using the wrong filter may lead to compatibility issues or inadequate filtration.
Step 2: Insert the New Filter
Once you have the replacement filter, carefully insert it into the filter slot. Ensure that it fits snugly and securely. Double-check the orientation if the filter has specific installation instructions.
Step 3: Replace the Filter Cover
With the new filter in place, reattach the filter cover. Use the screws or clips to secure it tightly. This will prevent any dust or debris from entering the filter compartment.
Recommended:
- How To Clean A Projector Screen (Top Secrets Revealed!)
- Learn How To Hang A Projector Screen Like A Pro!
- Projector In Basement: Turn Your Basement into a Home Theater Haven
- Best Cheap Projector For PowerPoint Presentations
- OLED vs Projectors: Which Will Dominate!
- Learn How To Mount A Projector To A Drop Ceiling!
Common Mistakes to Avoid During the Process

While cleaning and removing a projector filter, it’s essential to avoid certain mistakes that could potentially damage your projector:
- Using excessive force: Be gentle when removing the filter cover or handling the filter itself to prevent breakage.
- Neglecting to unplug the projector: Always disconnect the projector from the power source before performing any maintenance tasks to avoid electrical hazards.
- Skipping the user manual: Each projector model may have specific instructions and precautions. There you can follow the user manual for accurate guidance overthere.
Maintenance Tips for Projector Filters
To maintain the cleanliness of your projector filter and prolong its lifespan, consider the following tips:
- Regular Cleaning: Clean the projector filter at least once every three months, or more frequently if you use the projector in dusty environments.
- Environmental Factors: Minimize exposure to excessive dust, smoke, or other airborne particles by keeping the projector in a clean and controlled environment.
- Filter Replacement: If you have a disposable filter, consider replacing it periodically, as they can become less effective over time. Check your projector’s manual or consult the manufacturer for filter replacement recommendations.
- Professional Servicing: For complex or high-end projectors, it may be advisable to have the device serviced by a professional technician. They can perform a thorough cleaning and inspection to ensure optimal performance.
How to Remove and Clean A Projector Filter: FAQs

Do all projectors have removable filters?
No, not all projectors have removable filters. Consult your projector’s user manual or contact the manufacturer to determine if your model has a removable filter.
How often should I clean my projector filter?
The frequency of cleaning the projector filter depends on various factors, such as the environment in which the projector is used. As a general rule, it is recommended to clean the filter every 100 to 200 hours of projector usage or at least once every three months.
Can I clean the projector filter with water?
If your filter is washable, you can clean it with a mixture of isopropyl alcohol and distilled water. Follow the manufacturer’s instructions for proper cleaning guidelines.
Can I use a vacuum cleaner to clean the projector filter?
It is not recommended to use a vacuum cleaner directly on the projector filter, as it may cause damage. Stick to gentle cleaning methods such as tapping, brushing, or using compressed air.
Can I use my projector without a filter?
It is not advisable to use the projector without a filter. The filter plays a crucial role in preventing dust, dirt, and debris from entering the internal parts of the projector. Operating the projector without a filter can result in damage to the optical elements and reduced performance.
What should I do if my projector filter is damaged?
If your projector filter is damaged, it is best to consult a professional technician or contact the manufacturer for assistance. They can guide you on obtaining a replacement filter or offer repair services if necessary.
Can I reinstall the filter while it’s still wet?
No, it is essential to ensure that the filter is completely dry before reinstalling it to prevent any moisture-related damage to the projector.
Could a dirty filter be the cause for deteriorated image quality?
Yes, a dirty filter can impact the image quality by obstructing airflow and causing the projector to overheat. Cleaning or replacing the filter can often resolve such issues.
Final Thoughts
If you experiencing reduced image quality or overheating issues with your projector, the culprit might be a clogged or dirty projector filter. Projector filters play a crucial role in maintaining optimal performance and preventing dust and debris from entering the projector’s internal components.
Cleaning the projector filter is a crucial aspect of projector maintenance that should not be overlooked. By following the step-by-step instructions provided in this article, you can effectively remove and clean the projector filter, ensuring optimal performance and prolonging the lifespan of your device.
Remember regular maintenance and proper care will help you enjoy crisp, vibrant images from your projector for years to come. Thanks For Reading!
As an experienced Software Engineer in a Projection-Based Technology Company, I love sharing my Knowledge to utilize and help others to learn more about Projectors. Thus one can get the right Projector for their needs.